When I went outside this morning I noticed one of the solar torch
lights we have along our walkway was just laying on the ground without
its plastic post. It was right in the spot where we had it posted in the
ground but the post that holds it up was nowhere to be found. I was
confused, thinking who would want to steal a short plastic pole for a
solar torch and not the light itself? So I went back through the
security camera footage and at 12:49am two blurs zipped across the
screen and plowed right through the torch post. When I ran it back at
normal speed I saw it was two cats running full speed, one chasing the
other, with the lead cat crashing through the solar torch so hard that
the post flew into the nearby bush and the torch top fell right in
place: https://youtu.be/z7aWxQ1JHfE
We were finally able to get American Home Shield to send out a different company for a second opinion on our air conditioner. They sent Cold Snap Air Conditioning, who arrived this morning. He found the same valve leak that JR from Service 1 found but after fixing that he did a test with nitrogen and also found a second leak in the condenser coil which Service 1
didn't even bother to check. He also concurred with our assessment that
some of the duct work needed to be replaced. He then smelled a gas leak
which he was able to confirm and get fixed. So we were very happy with
his service.
Thursday, July 4, 2019
Monday, July 1, 2019
HP Laptop Keyboard Install
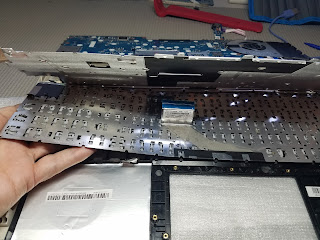
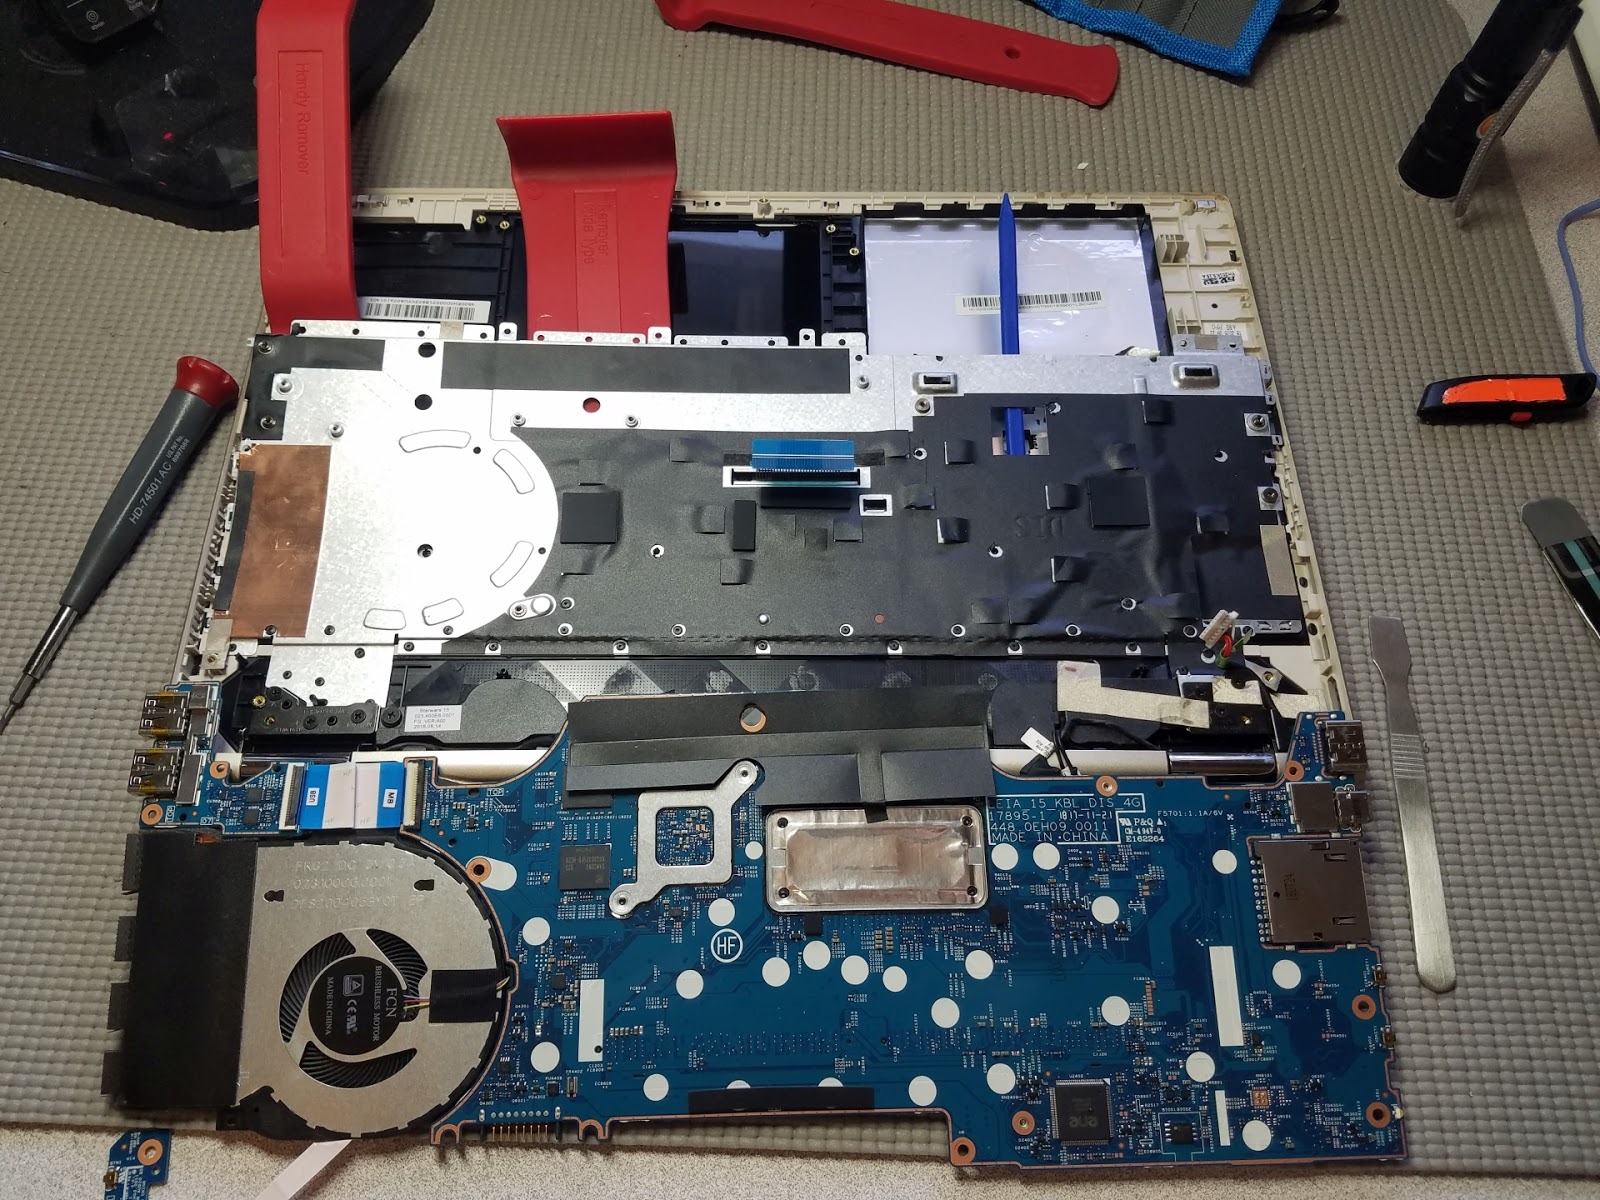
I installed the backlit keyboard in my HP laptop this weekend. What a
chore that was! I used my soldering iron to melt all the plastic
rivets, carefully prying up the metal back plate as I went along until I
could lift it enough to have access to the underside of the keyboard. I
then had to melt more rivets so that I could pry up the keyboard. When I
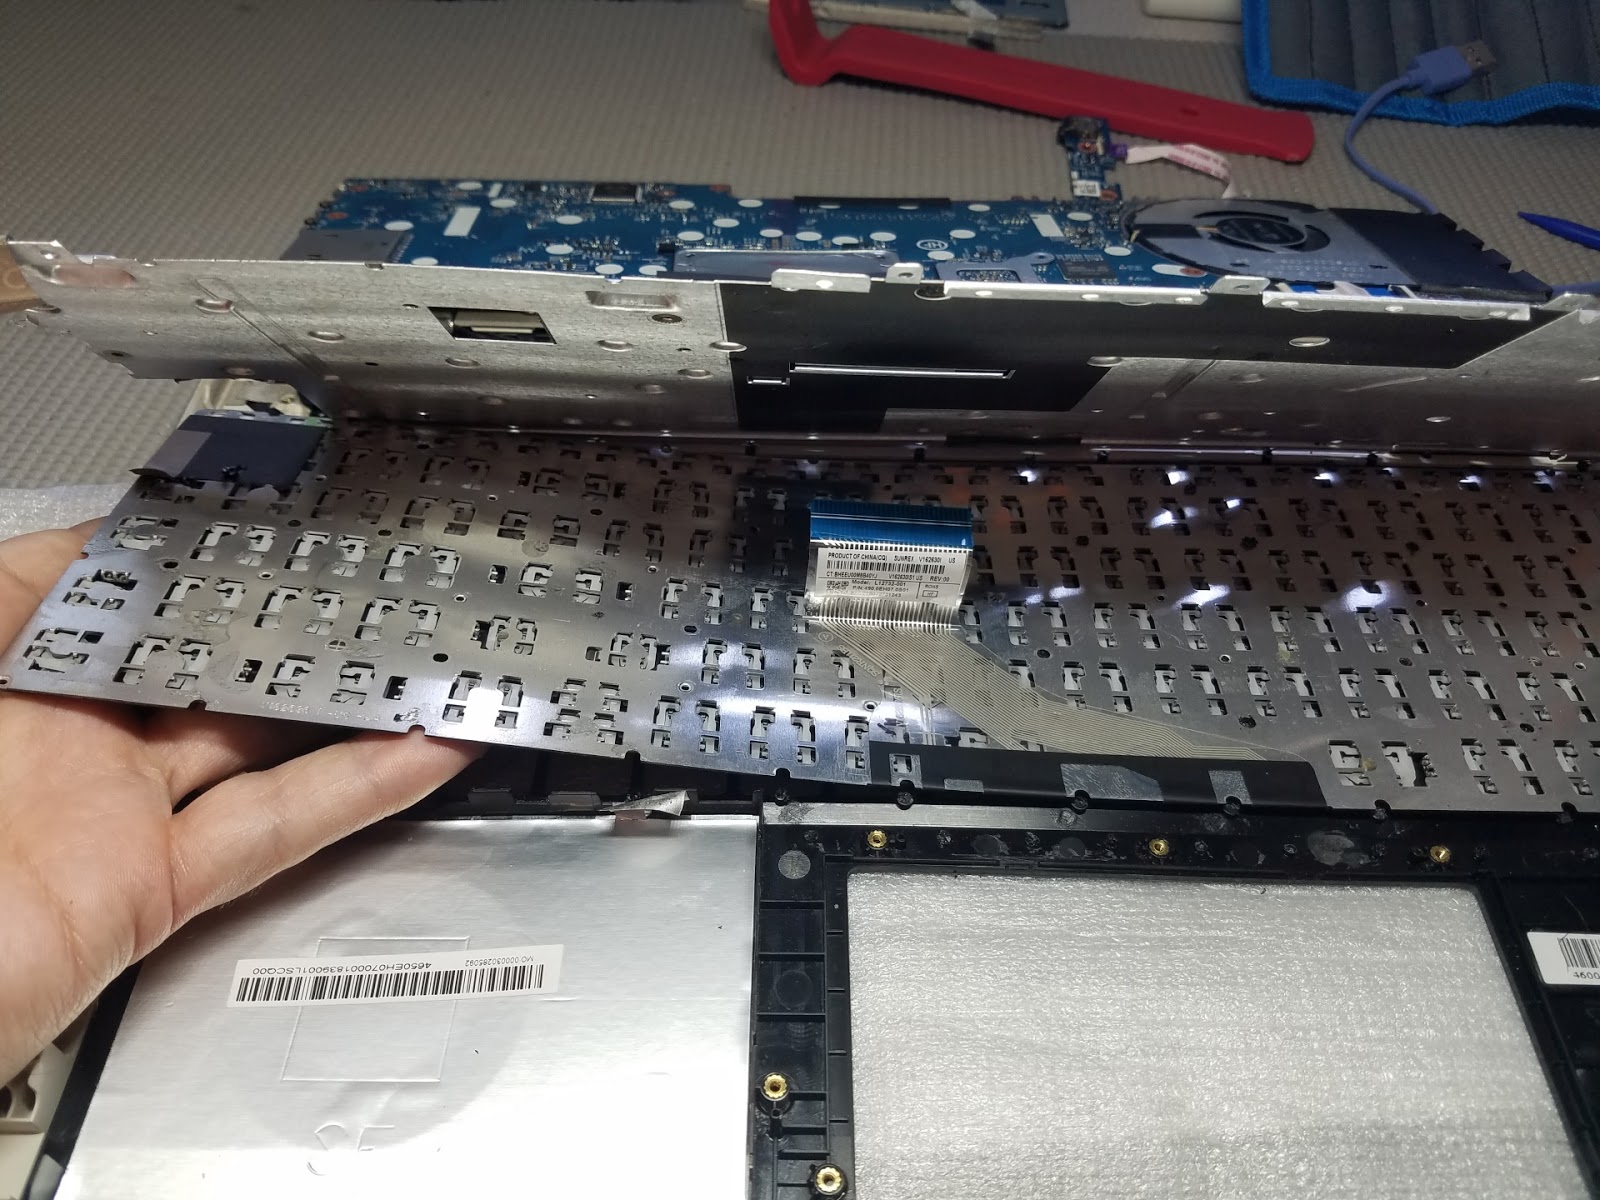
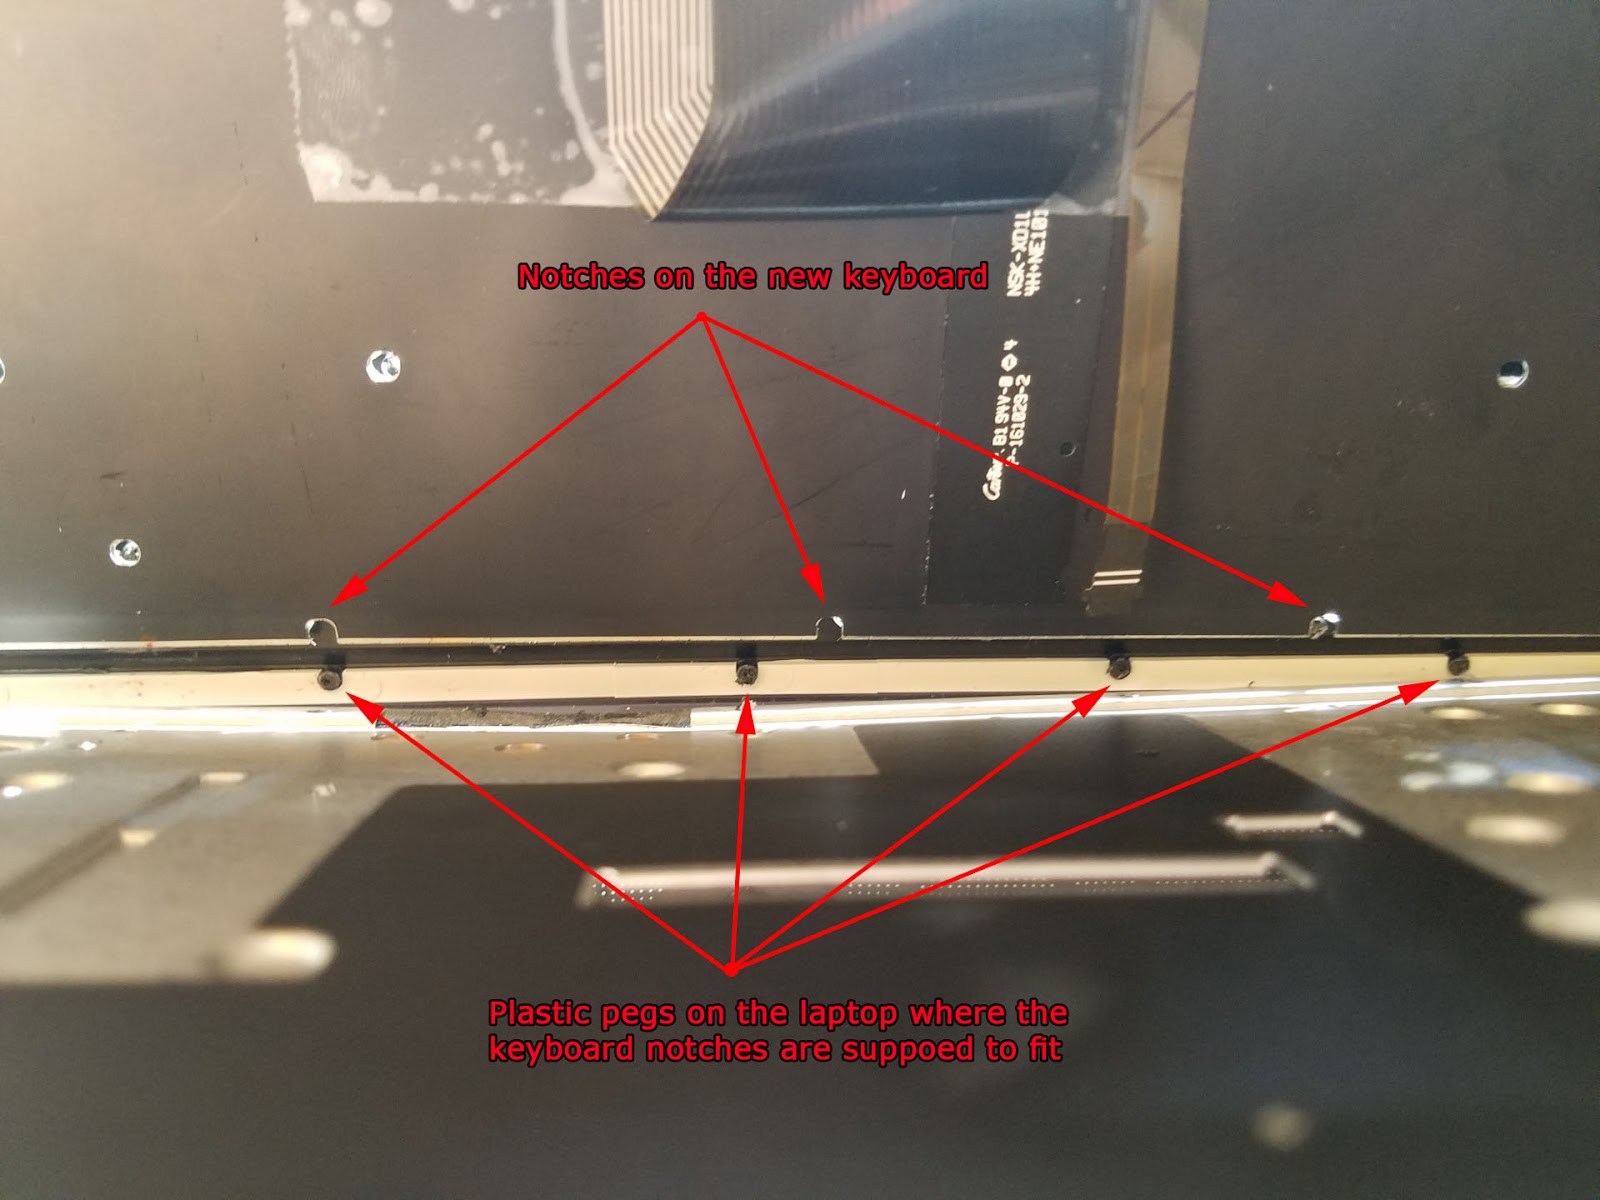
put the new backlit keyboard in I found that there were three notches
which did not line up with the plastic pegs on the laptop. Argh!
The backside of the keyboard is metal so I couldn't just use scissors or a utility knife to cut out notches, and my tin snips don't offer the level of precision I would need, so the only option I could see was to cut off the plastic pegs that didn't align. There wasn't enough room to get even a small utility knife in there so I cut them with nail clippers and then filed them down the rest of the way with a metal nail file. Once I put the new keyboard in place I made some new notches with hot glue. I also used hot glue to recover all the plastic rivet tops I had melted away. I had tried spreading the plastic out with the soldering iron to make new heads but it just wasn't working.
I spent pretty much the entire day on this keyboard replacement and am happy that I got it done and it worked. This keyboard feels much nicer than the original and has a backlight so I can see what I'm doing even in low light. The whole process soured me on HP, though. They could have used screws or plastic clips but no, they designed it this way on purpose. Not cool, HP! I'll definitely think twice about purchasing an HP laptop in the future.
Subscribe to:
Posts (Atom)