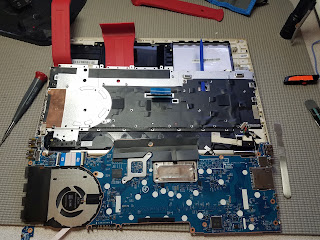
I installed the backlit keyboard in my HP laptop this weekend. What a
chore that was! I used my soldering iron to melt all the plastic
rivets, carefully prying up the metal back plate as I went along until I
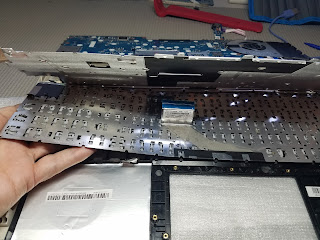
could lift it enough to have access to the underside of the keyboard. I
then had to melt more rivets so that I could pry up the keyboard. When I
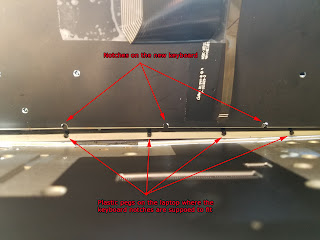
put the new backlit keyboard in I found that there were three notches
which did not line up with the plastic pegs on the laptop. Argh!
The backside of the keyboard is metal so I couldn't just use scissors
or a utility knife to cut out notches, and my tin snips don't offer the
level of precision I would need, so the only option I could see was to
cut off the plastic pegs that didn't align. There wasn't enough room to
get even a small utility knife in there so I cut them with nail clippers
and then filed them down the rest of the way with a metal nail file.
Once I put the new keyboard in place I made some new notches with hot
glue. I also used hot glue to recover all the plastic rivet tops I had
melted away. I had tried spreading the plastic out with the soldering
iron to make new heads but it just wasn't working.
I spent pretty much the entire day on this keyboard replacement and
am happy that I got it done and it worked. This keyboard feels much
nicer than the original and has a backlight so I can see what I'm doing
even in low light. The whole process soured me on HP, though. They could
have used screws or plastic clips but no, they designed it this way on
purpose. Not cool, HP! I'll definitely think twice about purchasing an
HP laptop in the future.


No comments:
Post a Comment